How to Use a Meat Thermometer: Find the Thermal Center (Most People Miss This)
How to Use a Meat Thermometer: It's Not Just About Poking
Owning a thermometer is step one. Knowing how to wield it is step two.
Many home cooks insert the probe, see a number, and assume it is correct. But if you poke through to the pan, touch a bone, or miss the "thermal center," you might be serving raw chicken while the screen says "Done."
In this guide, we cover the techniques for accurate measurement, calibration, and hygiene. For guidance on choosing the right device, see our meat thermometer types guide.
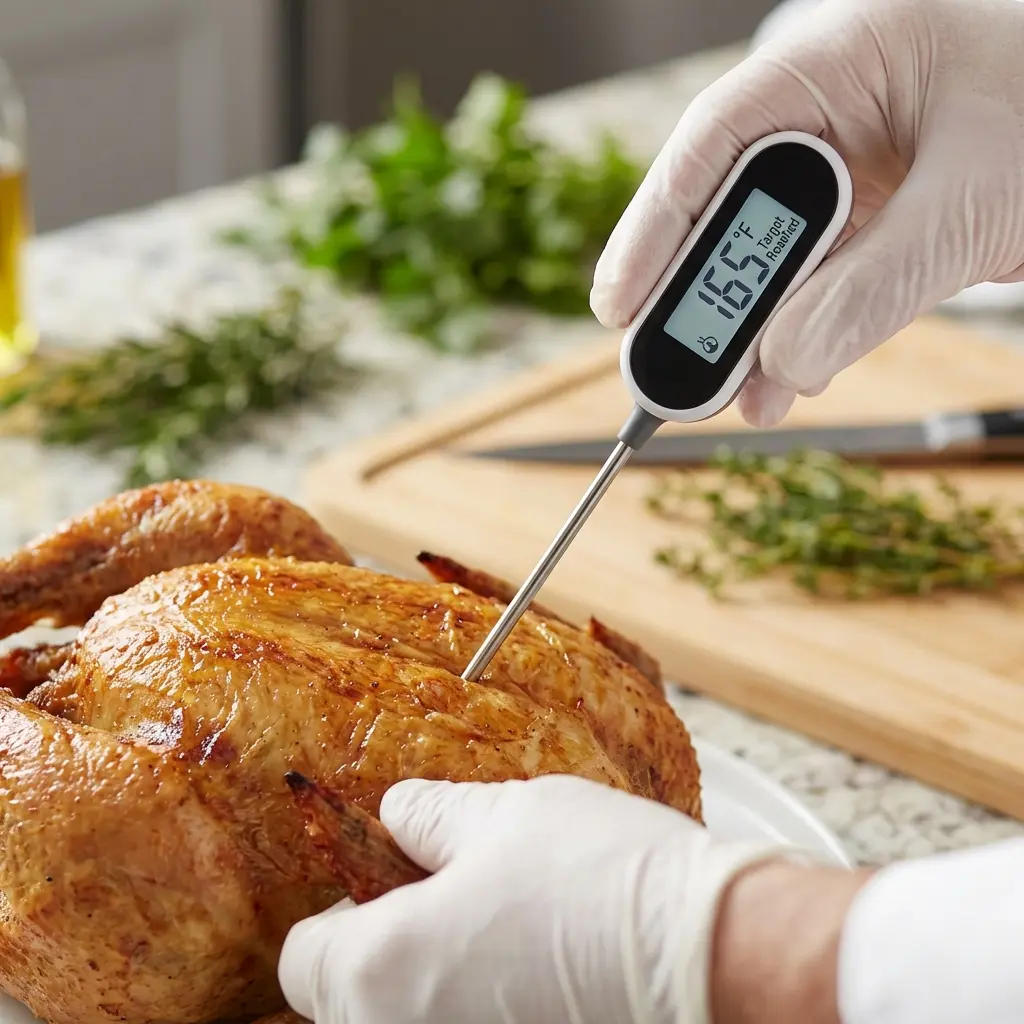
1. Finding the "Thermal Center"
The "Thermal Center" is the coolest part of the food. It is usually (but not always) the geometric center. Ideally, this is the point you want to measure.
The Pull-Back Technique: This is the most reliable way to find the lowest temperature.
- Insert the probe deeply into the meat—perhaps a bit too deep (past the center).
- Watch the display. It will rise.
- Slowly pull the probe back out.
- Watch the numbers drop, then rise again as you near the surface.
- The Lowest Number you saw during the pull-back is the true internal temperature of the center.
2. Dealing with Bones
Bone is thermally conductive (meaning it heats up faster than meat) but marrow is insulating. Rule: If you touch the bone, the reading will be wrong.
- Usually, touching bone results in a high reading (heat travels down the bone).
- Tip: If the probe hits something hard, pull back 1/2 inch.
3. Thin Cuts (Burgers, Chops, Steaks)
Common mistake: Stabbing from the top down.
- On a 1-inch steak, the sensor might poke right through to the bottom crust, reading the grill heat.
- Solution: Insert from the SIDE. Go horizontally into the center of the patty or steak. This puts the entire sensor length in the cool zone.
4. Calibration (The Ice Water Test)
Is your thermometer lying to you? Test it with Physics. Water freezes at exactly 32°F0°C (at sea level). For a complete calibration walkthrough, see our thermometer calibration guide.
The Ice Bath Method:
- Fill a glass to the top with crushed ice.
- Add cold water until it barely covers the ice.
- Let it sit for 1 minute.
- Stir firmly with the probe.
- Reading should be 32°F0°C (or 33°F1°C).
- If it reads 38°F3°C or 25°F-4°C, hit the "CAL" button or twist the adjustment screw until it reads 32°F0°C.
Note: Boiling water is a bad calibration standard because the boiling point changes drastically with altitude.
5. Cleaning & Sanitation
Cross-contamination is the enemy.
- Scenario: You probe raw chicken to check progress. It reads 100°F38°C. It is raw.
- Mistake: You put the probe back in the drawer or on the counter.
- Later: You probe the cooked chicken. It reads 165°F74°C.
- Result: You just re-injected Salmonella from the first poke deep into the cooked sterile meat.
Protocol:
- Keep an alcohol wipe or soapy sponge nearby.
- Wipe the probe stem every single time you pull it out of undercooked meat.
For more maintenance tips, see our thermometer care guide.
Frequently Asked Questions (FAQ)
Q: Why does the temperature keep changing?
A: Because heat is dynamic. The outside of the roast is 300°F149°C, the middle is 100°F38°C, and the center is 130°F54°C. Moving the probe even 1 millimeter changes the reading. Use the "Pull-Back Technique" to find the cold spot.
Q: How much hole does it leave?
A: A high-quality thermocouple leaves a hole the size of a needle (approx 1.5mm). The amount of juice lost is negligible—maybe 2 drops. The juice lost by overcooking the meat is about 1/4 cup. It is a worthy trade.
Q: Can I use it for oven temperature?
A: Yes! Clip the probe to the rack (using a potato or a ball of foil so it doesn't touch metal). You will likely find your oven runs 25°F15°C degrees hotter or cooler than the dial says.
Q: What if the screen is foggy?
A: Moisture got inside.
- If it works: Put it in a bag of rice/desiccant for 2 days.
- If it flickers: It's dead. Buy a waterproof IP65 one next time.
Frequently Asked Questions
Why does the temperature keep changing?
Because heat is dynamic. The outside of the roast is [300\|149], the middle is [100\|38], and the center is [130\|54]. Moving the probe even 1 millimeter changes the reading. Use the "Pull-Back Technique" to find the cold spot.
How much hole does it leave?
A high-quality thermocouple leaves a hole the size of a needle (approx 1.5mm). The amount of juice lost is negligible—maybe 2 drops. The juice lost by _overcooking_ the meat is about 1/4 cup. It is a worthy trade.
Can I use it for oven temperature?
Yes! Clip the probe to the rack (using a potato or a ball of foil so it doesn't touch metal). You will likely find your oven runs [25\|15] degrees hotter or cooler than the dial says.
What if the screen is foggy?
Moisture got inside. - If it works: Put it in a bag of rice/desiccant for 2 days. - If it flickers: It's dead. Buy a waterproof IP65 one next time.